Monographic parts are used to separate items which are part of the same bibliographic entity, meaning you have items with different content attached to the same Bibliographic record
Examples of monographic parts include:
- Various volumes of one book, such as an encyclopedia or other multi-volume work
- Separate parts in large audiobook
- Separate parts or discs in an DVD set
- Some libraries treat the books in Manga series as monographic parts
Assigning parts to your item(s) allows patrons to place holds on the specific part they want, rather than receiving whichever part is the next one available (This appears as “Any part” from the “Place Hold A request placed by staff or patrons for materials to be picked up at a selected location (see Pickup Library).
Material shipped between Evergreen Indiana libraries.
A request placed by staff or patrons for materials to be picked up at a selected location (see Pickup Library).

Note #
You must name your parts according to specific standards set in the Evergreen Indiana Cataloging Procedure Guide. It includes information on general designators, magazines, and audio/visual materials. In general, you should not create separate parts for audiobooks or music CDs, unless a library has already done so.
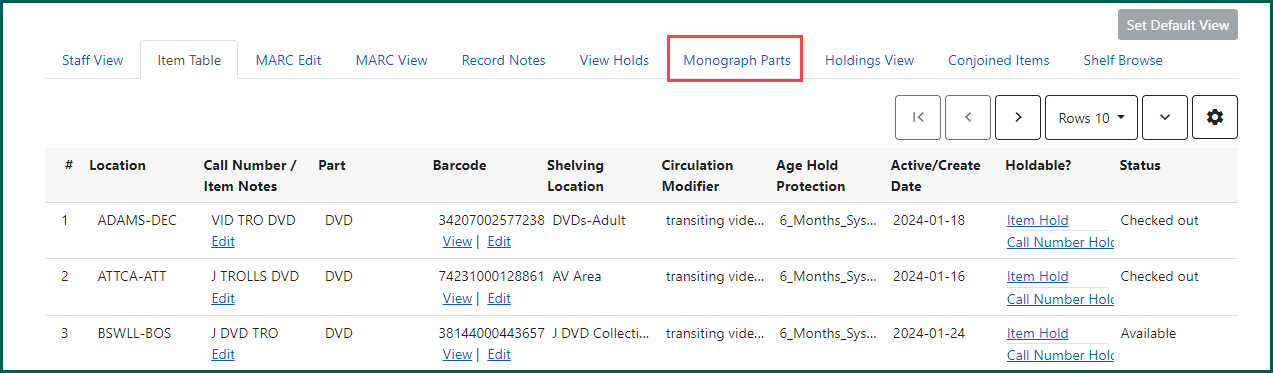
Monograph Parts Tab #
The Monograph Parts tab allows you to create, delete, and manage parts on a record.
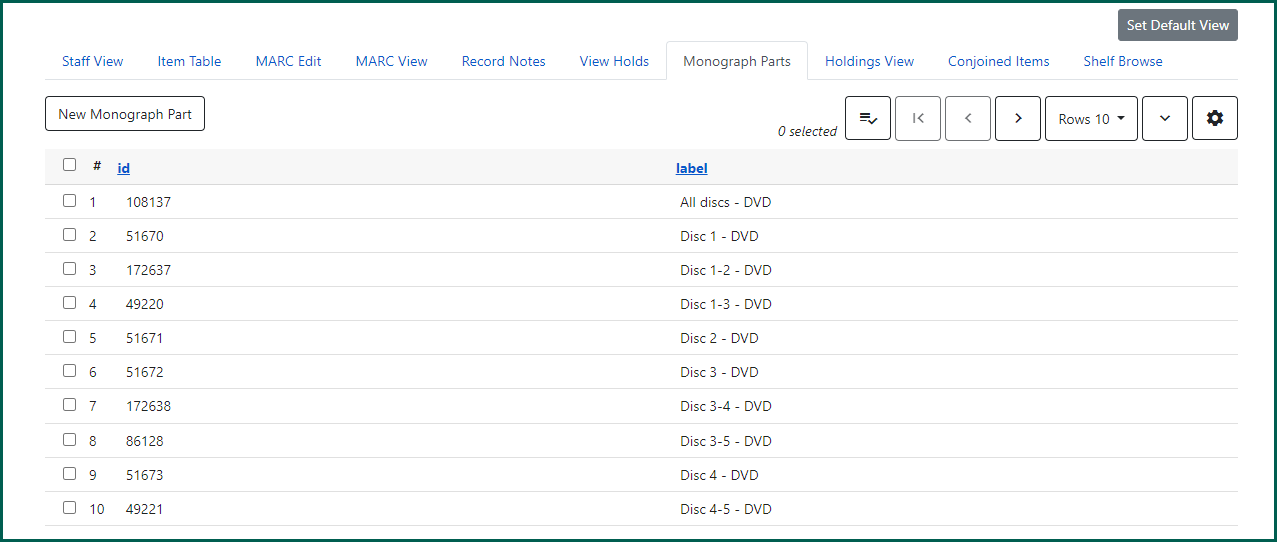
The parts which have been created for the Bibliographic record
Do not delete monograph parts. Evergreen automatically deletes parts when no items are assigned to that part. Deleting a monographic part removes that part from all items assigned to it and may affect holds currently placed on that part. If there are duplicate parts, merge them, do not delete them!
Creating Parts #
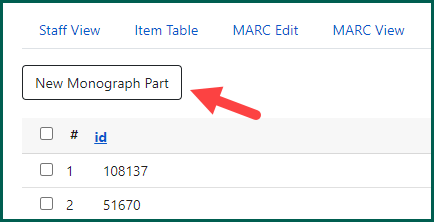
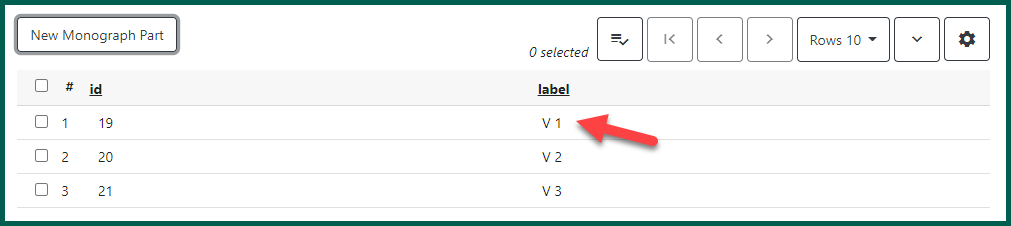
Click the “New Monograph Part” button on the upper right hand corner:
A part creation box will open:
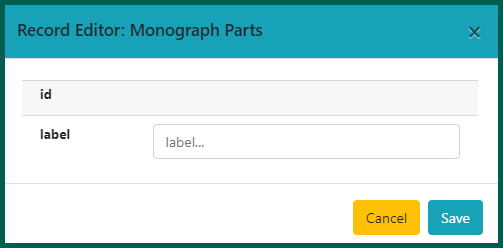
Type your part name into the “label” text field, then click Save:
NOTE: Please refer to the section on Monographic Parts in the Cataloging Procedure Guide on creating part names consistent with Evergreen Indiana guidelines.
Your part will now appear in the list:
Editing Part #
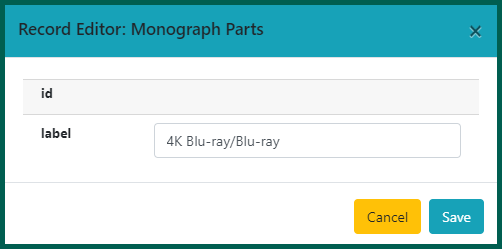
Within the Monograph Parts tab, double-click on the part name that you wish to edit.
Make your changes and click Save.

The part will update and a confirmation will appear on the bottom right of the screen.
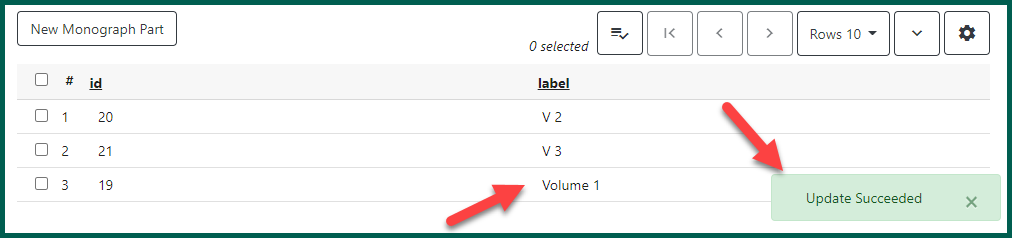
NOTE: This will affect all items attached to this part, including items at other libraries.
Merging Parts #
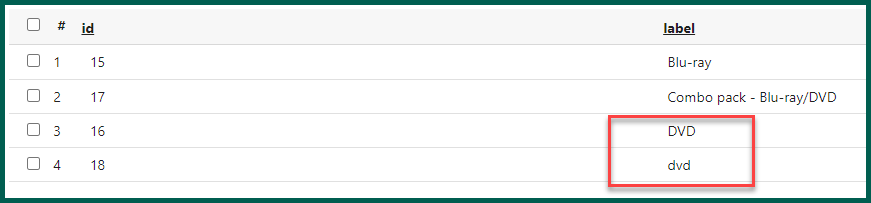
Merging parts will decrease the number of duplicate part names.
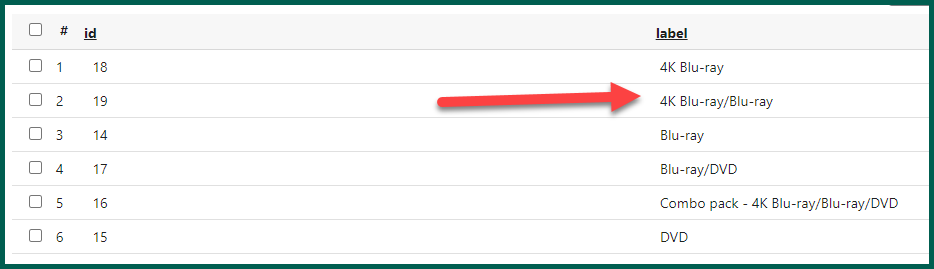
In this example from the Monograph Parts tab, there are two parts for the single DVD disc, but the second one is not correctly formatted, as ‘DVD’ should be in all upper case letters:
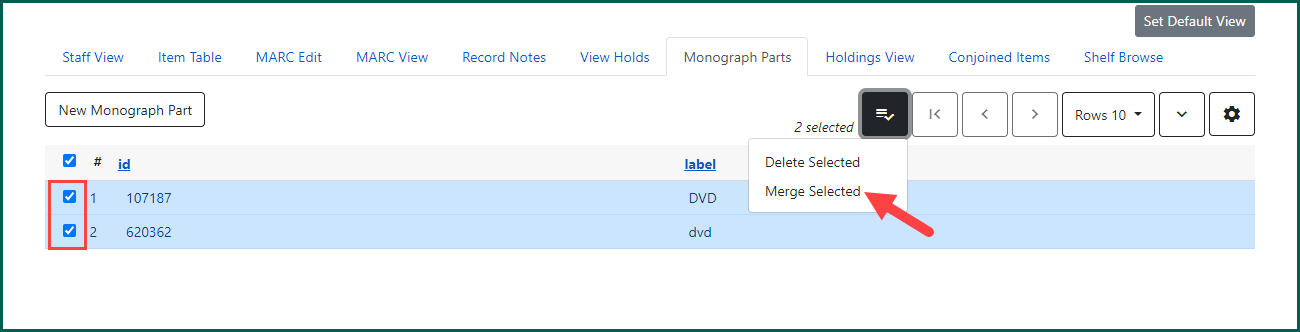
Check mark both parts, then right-click or select Actions and choose Merge Selected.
From the pop-up, select the lead part and click Merge.
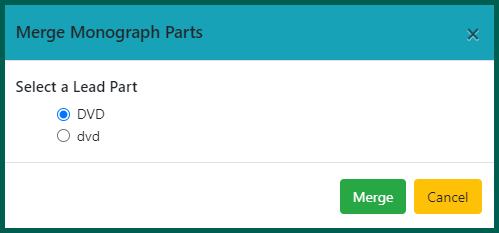
The screen will automatically refresh and the parts will be merged into one.

NOTE: Any item with the old part attached will update to the new/merged part. This will not affect holds.
Adding Parts to New Items #
The ability to create and/or add parts as you are adding items can be done in the Holdings Editor.
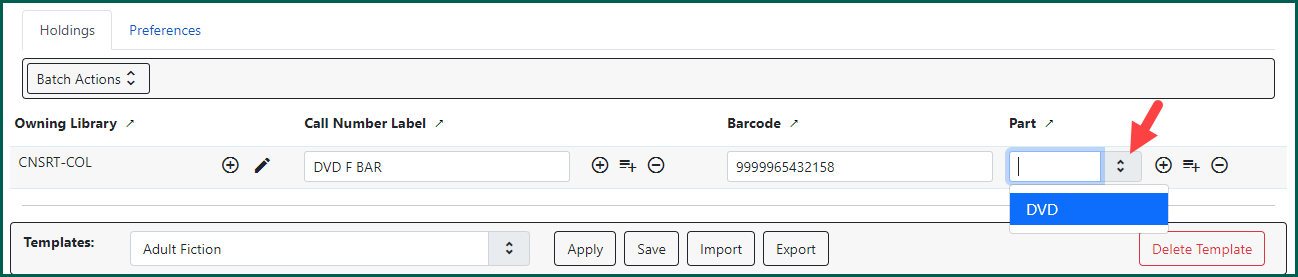
Click Add Holdings from the item summary page. The Holdings Editor will open in a new tab. The Part drop-down menu appears to the far right in the Holdings Details section of the Holdings Editor.

You can either start typing to see if parts already exist for your item, or click on the arrow to see all of the parts that have already been created:

If the part exists, click on the part name to select it:

NOTE: Parts are created at the consortial level, and they are used by everyone. If the parts you need have already been created, they will be displayed in the dropdown list. Simply select the appropriate part. Do not try to create a new part if the existing parts match your items.
You can make other edits to your item, then click Apply All, Save & Exit, and your part will be assigned.
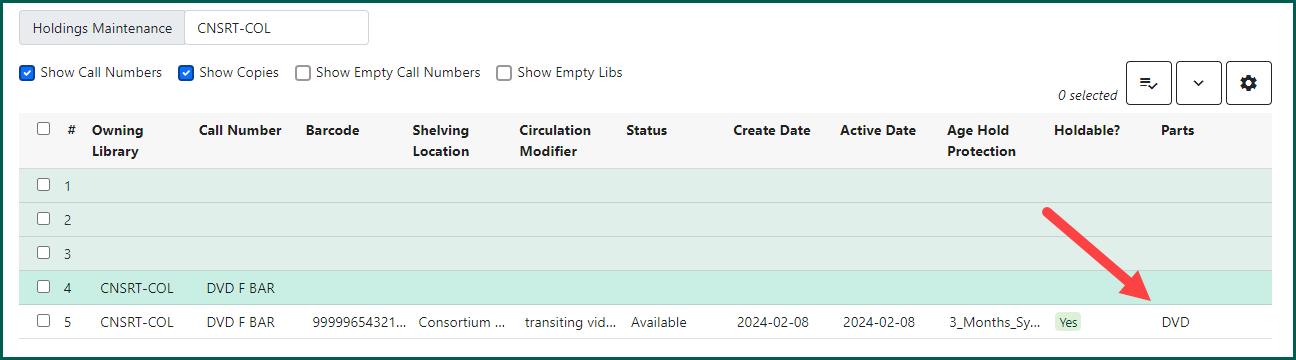
Parts can be viewed in the Staff Catalog and Patron
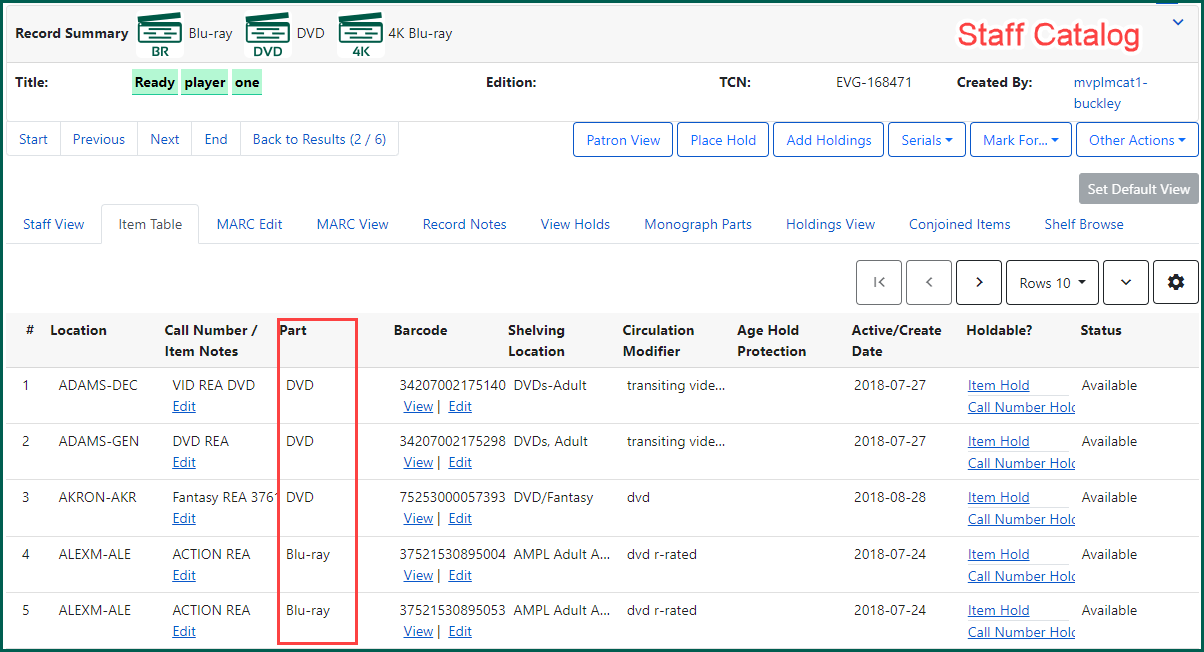
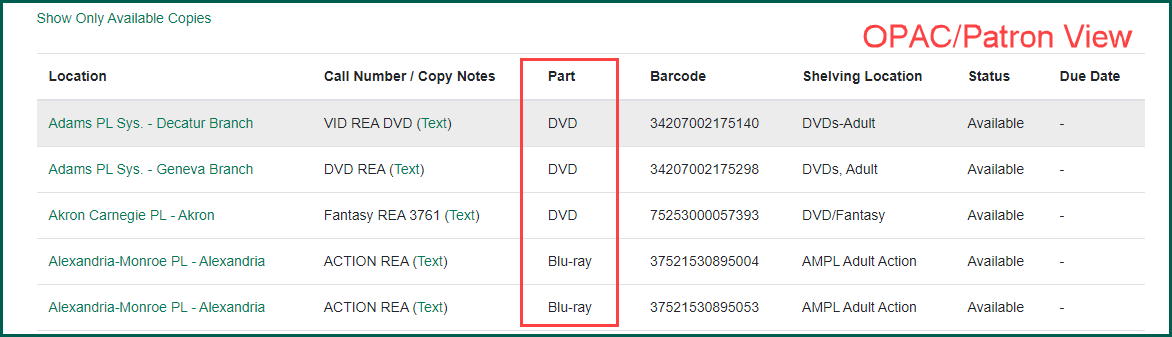
Note: This column will not exist if parts have not been created for the record.
If you do not find the part you need, type the name of the part into the field. There is no additional button to click from the holdings editor to create your part. It will be created once you click Apply All & Save, or Apply All, Save & Exit.

Your volumes and items will be added, and your parts will be created and attached to the appropriate items.
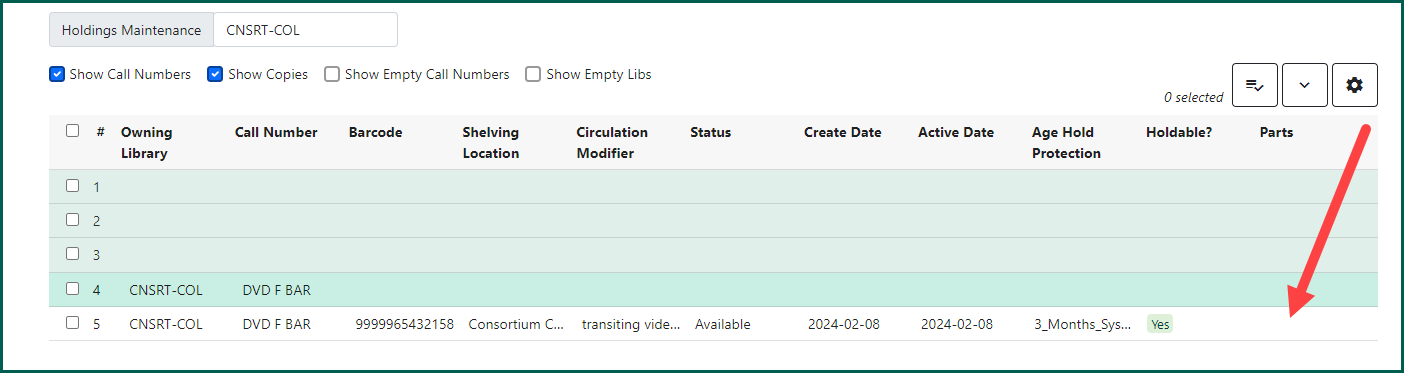
Assigning Parts to Existing Items #
To assign parts to existing items, go to the Holdings View tab. Make sure the Parts column is viewable by selecting it from the Grid Options (See Column Picker for more details).
If no part has been assigned to an item, nothing will appear in the column for that item:
To assign a part, click the check box for the item(s), then right-click or select Actions and choose Edit Call Numbers or Edit Call Numbers and Items.
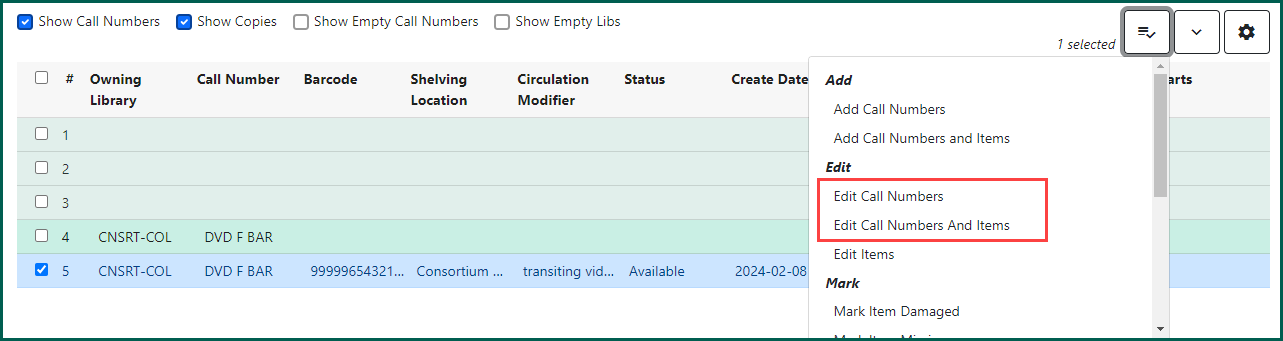
This takes you to the Holdings Editor, which will allow you to add or create parts from the drop down menu, as before:
When finished, click Apply All, Save & Exit. The part name will now appear under the Parts column.