NOTE: Whenever you edit a MARC record, please refer to the Evergreen Indiana Cataloging Procedures Guide to ensure that you have edited the record to meet the standards of the consortium.
To modify MARC records in the Evergreen Indiana catalog, the MARC Editor function is used. Access is available through the staff catalog while looking at a single Bibliographic record
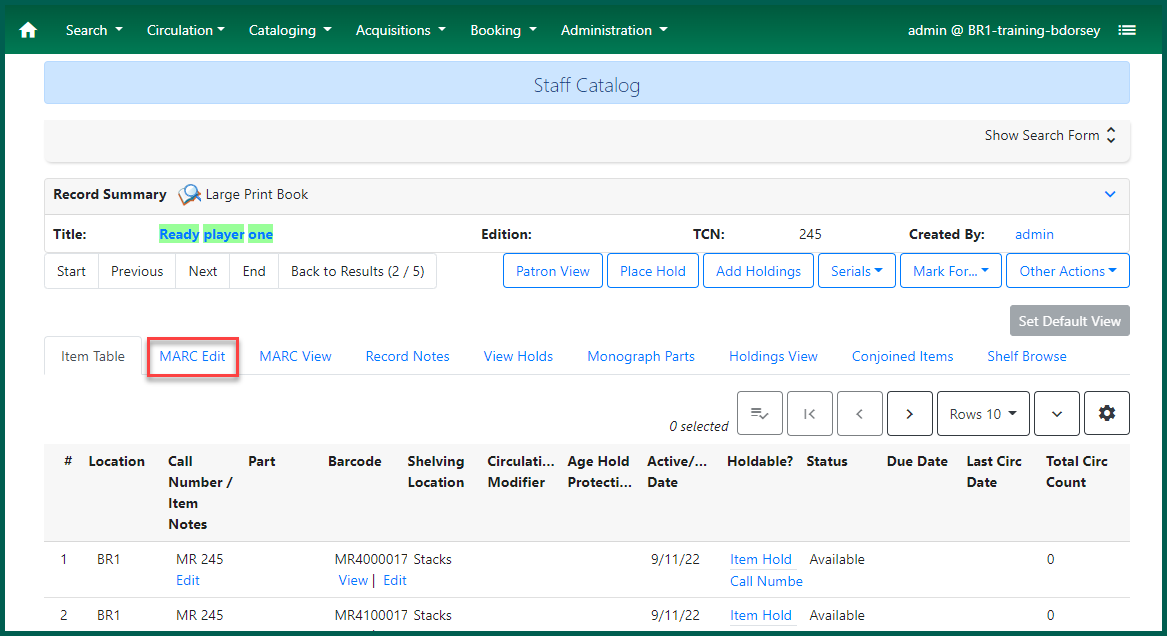
To edit a bib record’s MARC, select the MARC Edit tab in the Record Summary screen:

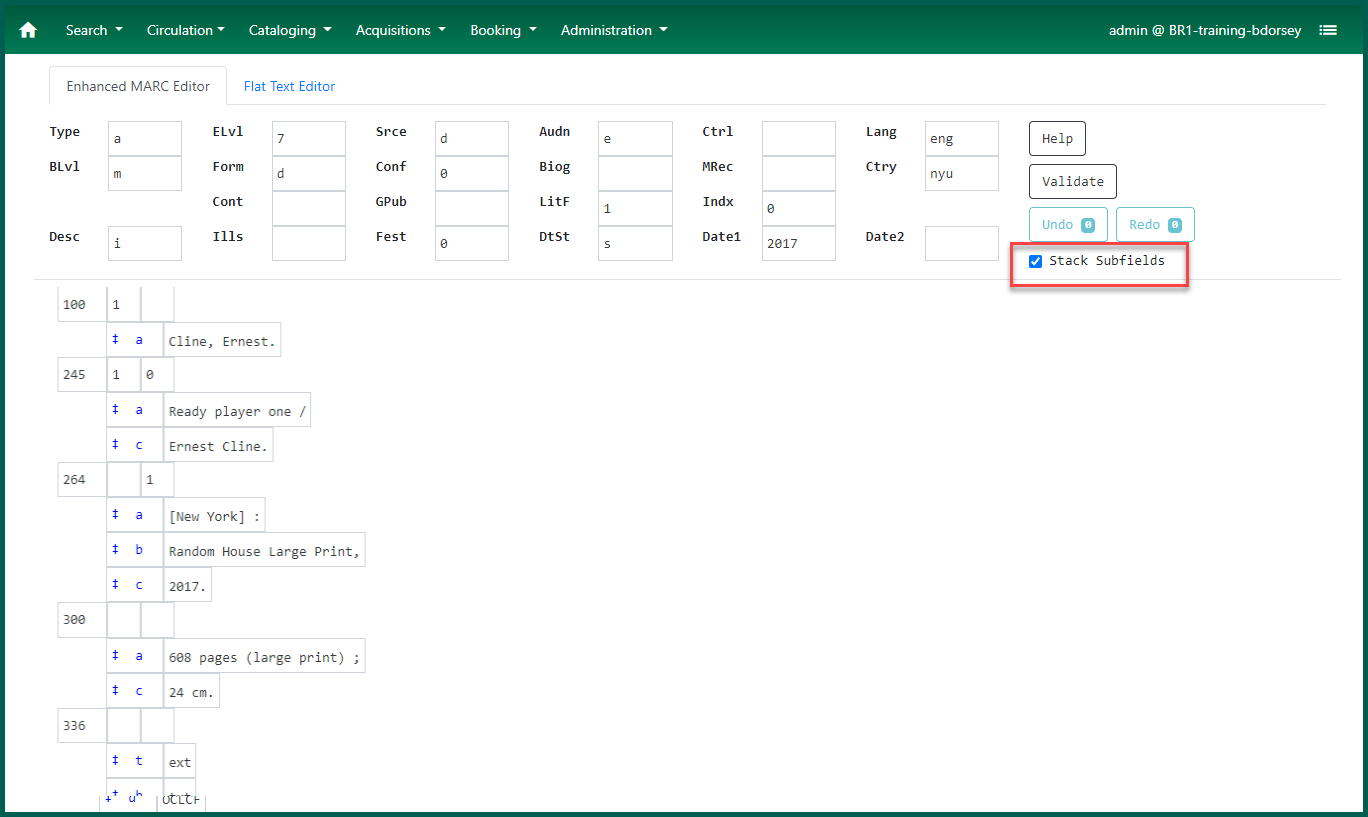
The MARC Edit view of the record will open, by default, in the Enhanced MARC Editor:

There are two main parts of the MARC Record: the fixed fields and the variable fields.
Editing Fixed Fields #
The fixed fields are displayed as a grid at the top of the record as well as in the LDR and the 008 field. It’s generally easier to make edits using the grid rather than LDR or the 008 field.

It’s important to check these fields and make sure the information in each field is accurate, as they affect searching and display for the record. The Type field is particularly important, as it affects both the format icons displayed in the OPAC and the item type search filters. Other fields which relate to search filters include Audn, Lang, Blvl, Form, Date1 and LitF.
TIP: For information about valid fixed field entries, see http://www.oclc.org/bibformats/en/fixedfield/default.shtm
Issues with Ills and Dates Fixed Fields #
There are a number of issues with the fixed fields as of v3.13.
A drop down will appear when clicking most of the fixed fields which will allow catalogers to select an appropriate code for that record.

You can use the tab key to navigate from field to field, or you can click on the box to enter the necessary information.
When a field is active, it will turn blue and what you type will appear in the box.

NOTE: If there is no 008 field in the record, that record is considered broken and you will be unable to save changes to the fixed fields. If this occurs, you can add the 008 field using the flat text editor explained in the section, Using the Flat Text Editor. Overlaying the record or merging it to another lead record with an 008 field will also solve the problem. See Overlaying Records or Merging Records if needed.
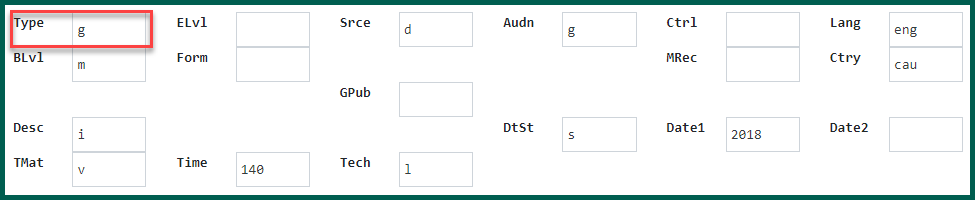
TIP: Different types of records have different fixed fields. Here you can see fixed fields for nonmusical sound recordings (Type=g) and maps (Type=e). The record type listed depends on the code entered in the Type fixed field.

TIP: If a fixed field is highlighted but nothing appears in the box when you type, try backspacing.
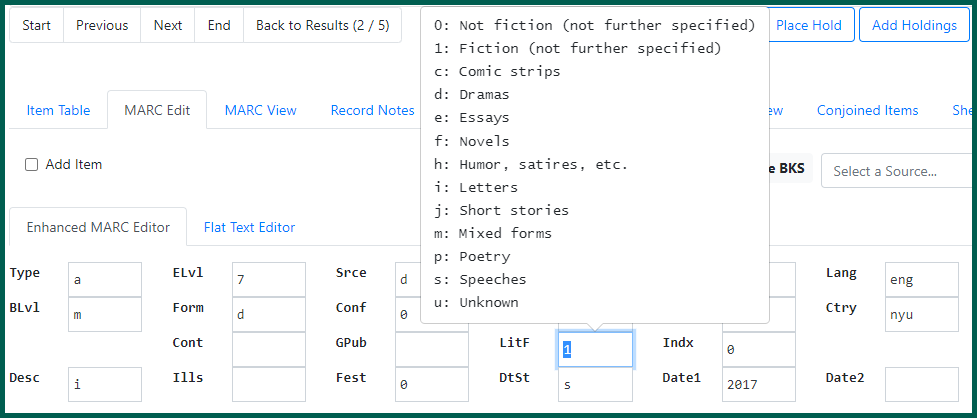
TIP: For many of the fixed fields, right-clicking will activate a drop-down menu of possible entries for the field, as seen below for the LitF fixed field. You can click on a selection from the list to add it to the field or to change the current entry in the field.
Editing the Variable Fields #
The variable fields have several parts. Each field has a field tag, first and second indicators, and at least one subfield.
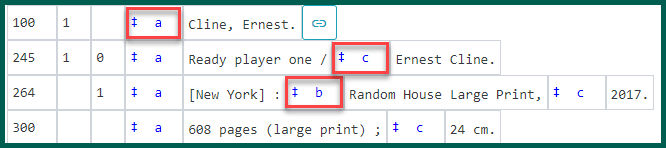
The field tag is the 3 digit number in the box at the beginning of the line. The field tags are outlined in red below:
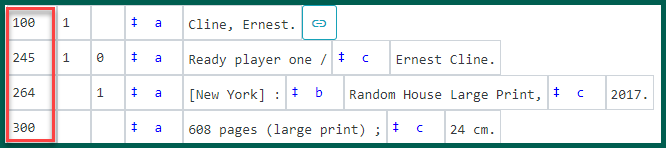
Each row is a field, named by a field tag, e.g. the 245 field, the 300, etc.
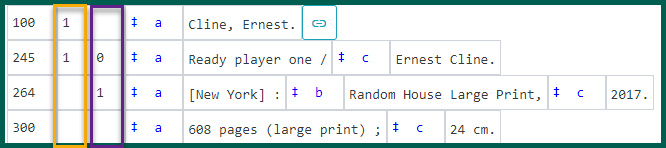
Each field has two indicators. The indicators are the numbers in the next two columns. The first indicator position is highlighted in orange below, and the second is highlighted in purple.
NOTE: The indicators mean different things in different fields, and in some fields, they are not used at all so remain blank.
Each field also contains at least one subfield, designated as a single lower case letter. Subfields are separated by delimiters, symbols that designate the beginning of the next subfield. In the Enhanced MARC Editor, the delimiter is a double dagger icon, ‡a, ‡z, etc.; the Flat Text Editor uses the dollar sign, $a, $z, etc.
Different subfields are valid for different fields, and the order of the subfields may vary.
See OCLC’s Bibliographic Formats and Standards for more information about the fields, indicators, and subfields.
The MARC editor displays the subfields on one line by default, as seen in the previous examples. If you prefer, you can check the Stack Subfields box, and the subfields will each display on a separate line. While this may be useful for editing an enhanced 505 field, it may also add extra scrolling.
The Help Feature #
The Help button in the MARC Edit view opens some lists under the fixed fields section of the record. Clicking Help again will close these lists.
This list of keyboard shortcuts is available to use in the Enhanced MARC Editor.
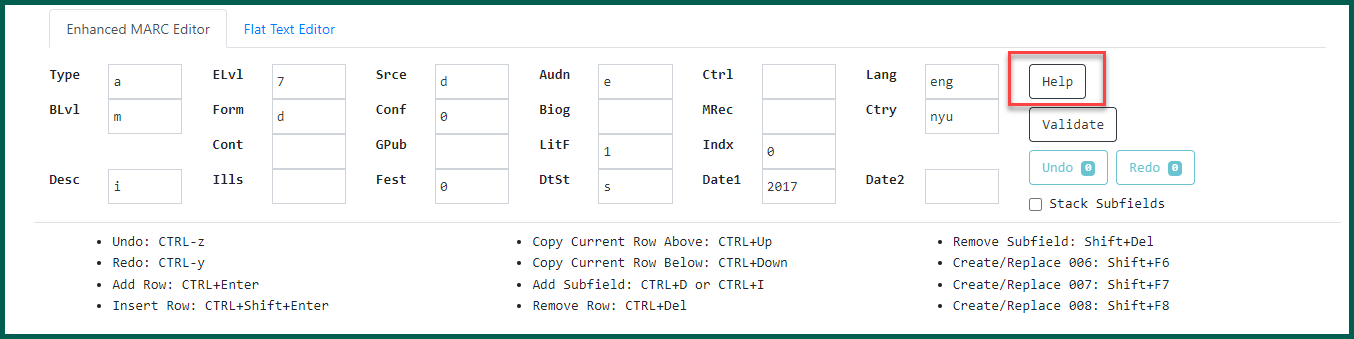
Undo (CTRL + Z) will undo your last edit.
Redo (CTRL + Y) will redo that action.
Add Row (CTRL + Enter) will add a new row below the line with the cursor.
Insert Row (CTRL + Shift + Enter) will insert a new row above the line with the cursor.
Copy Current Row Above (CTRL + Up) will insert a duplicate of the line with the cursor above that line.
Copy Current Row Below (CTRL + Down) will insert a duplicate of the line with the cursor below that line.
Add Subfield (CTRL + D or CTRL + I) will insert a subfield delimiter.
Remove Row (CTRL + Delete) will delete the entire line.
Remove Subfield (SHIFT + Del) will delete the subfield delimiter and any contents in that subfield.
Create/Replace 006 (SHIFT + F6) will insert a new 006 entry.
Create/Replace 007 (SHIFT + F7) will insert a new 007 entry.
Create/Replace 008 (SHIFT + F8) will insert a new 008 entry.
Undo and Redo #
While the keyboard shortcuts, Ctrl + Z and Ctrl + Y work to undo and redo changes in the MARC Editor, there are also buttons that keep track of your changes.

The numbers next to each button will adjust depending on how many changes are made in the MARC record.
Tag Submenus #
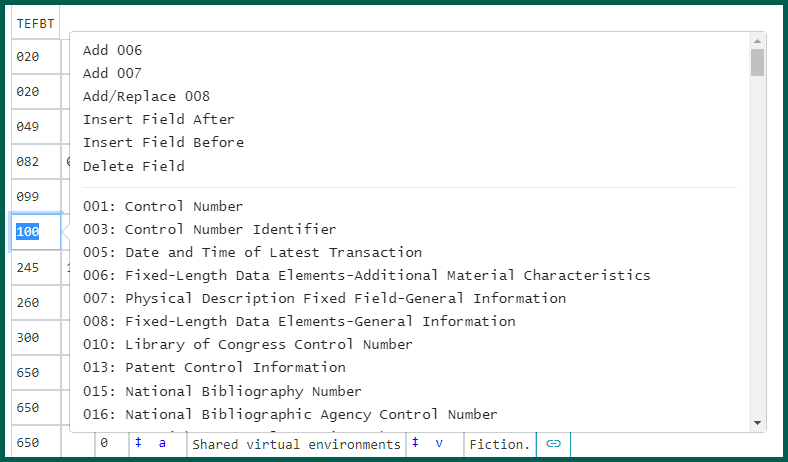
Right-clicking on the field tag opens a menu of field tag options. You can select one of the six options above the line to perform those actions. Alternatively, you can click on one of the field options below the line to change the field to the selected one. You can also manually enter a different field tag number into the field name to change it.
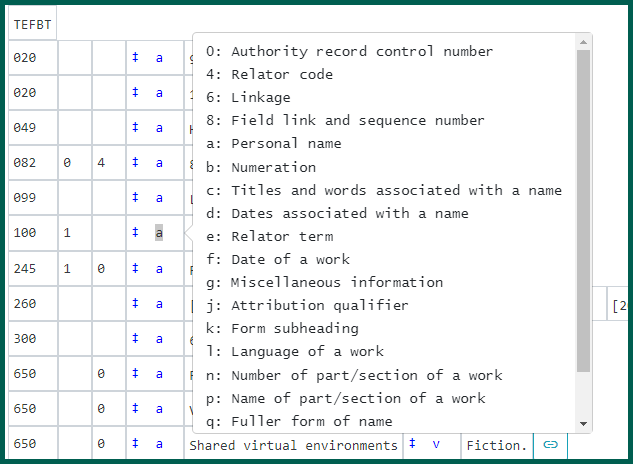
Right-clicking on a subfield will open a dropdown menu with entry options for that subfield and their meanings. You can click on one of these options to change the subfield to the selected one. You can also manually enter a different letter or number into the subfield name to change it.
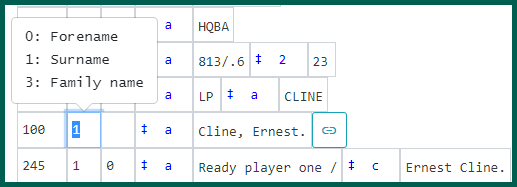
Right-clicking on an indicator will open a dropdown menu with entry options for that subfield and their meanings. You can click on one of these options to change the indicator to the selected one. You can also manually enter a different number into the indicator to change it.
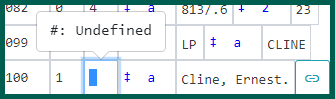
Many indicators should remain blank. Right-clicking on these will display only one option: #: Undefined
When you add a new row, you must enter the appropriate field tag, indicators and subfields.
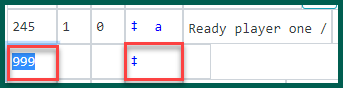
When adding a new row in the Enhanced MARC Editor, the field tag comes up as 999 by default, so you will need to change that to the number for the field that you need. Also, input for the first subfield is included automatically, but you must enter the subfield letter, usually subfield a.
TIP: If you want to rearrange fields in the MARC editor, you have to insert a new field where desired; cut and paste the information from the old field into the new field; and then delete the old field. Using the Flat Text Editor (described later in this chapter) can be easier for this type of editing.
New subfields must be added using the keyboard shortcut, CTRL + D. (This can be done instead by using the Flat Text Editor, which is described later in this chapter.) When subfields are entered properly, each will have its own white text box and a delimiter separating them. If you copy and paste fields with multiple subfields from other systems or from the MARC View screen, the MARC editor will not recognize the subfield delimiters. The pasted subfield shows the subfield delimiter in black, like text, rather than in blue, which indicates a subfield, as seen below.

In order to fix this, the delimiter and the subfield letter or number should be deleted, & in its place, a subfield should be inserted, using CTRL + D. After being corrected, the example above would look like this:
TIP: If the keyboard shortcut for the subfield delimiter is not working, try hitting the Caps Lock key.
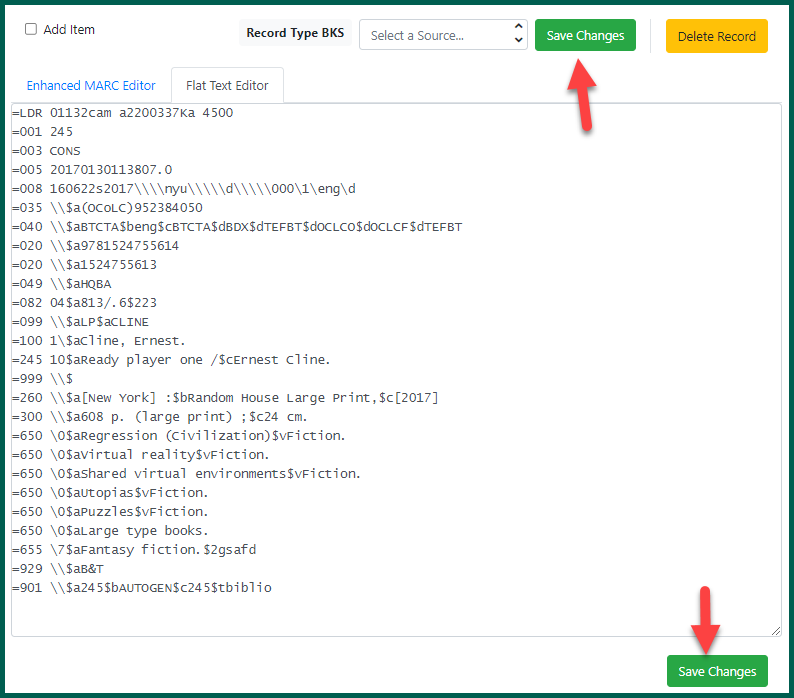
Once you have made all the desired changes to the MARC record, click Save Changes. This can be found above or below the MARC area.
If you exit the record without clicking Save Changes, you will see a dialog box:
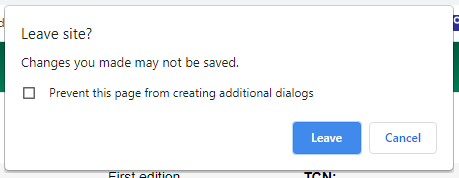
If you click Cancel, you will be returned to the record so you can continue to edit. If you click Leave, your changes will not be saved.
Using the Flat Text Editor #
The flat text editor is another MARC editing tool. It allows you to edit the MARC record in a text format, like a word processing document.
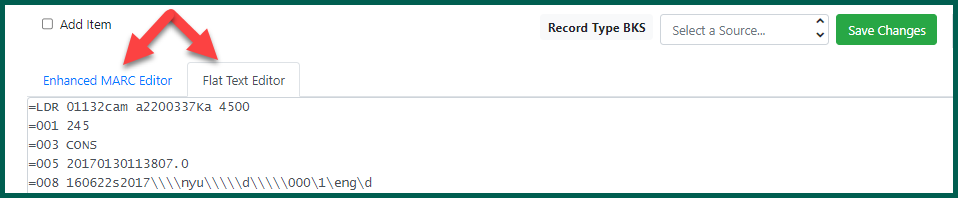
You can easily switch between the Enhanced MARC Editor and Flat Text Editor by clicking on either tab.
As you can see, the MARC display changes completely. Instead of separate boxes and fields for the MARC information, the flat text editor depends on formatting to keep the information in the proper fields.
Because the flat text editor acts like a word processing editor, it allows you to copy and paste or delete multiple subfields at once. You can make quick and easy updates, such as adding subject headings to a record.
Some uses for the flat text editor:
- It makes it easy to add new 006, 007, and 008 fields.
- It is the only way to remove 006, 007, and 008 fields.
- It makes it easy to “clone” a record if you need to create a record very similar to the one already in the catalog. You can simply open the existing record in the flat text editor, copy it, paste it into a new record, and then make the needed edits.
- It makes it easy to upgrade a poor or incomplete record. You can copy and paste subject headings, added entries, content notes, fixed fields, or any other data that will make the record more complete and more useful to our end users.
Field Formatting in the Flat Text Editor #
Editing with the flat text editor is fairly simple, but it is important to use the appropriate formatting, spacing, and characters. For example, entering a field into the flat text editor in the following format will make the record incorrect.
=655$aLarge print books.
The corresponding Enhanced MARC Edit view will look like this:

Instead, the field should be entered into the flat text editor like this:
=655 \\$aLarge print books.
It is also important to make sure that separate fields are entered on separate lines; otherwise, the field tag will not be read as indicating a new field. If the flat text looks like this:

The corresponding Marc Edit view will look like this:

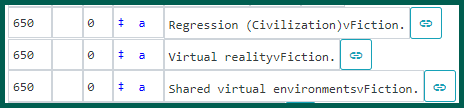
The dollar signs must be retained to indicate the subfields. If the flat text is entered like this:
=650 \0aRegression (Civilization)vFiction.
=650 \0aVirtual realityvFiction.
=650 \0aShared virtual environmentsvFiction.
The corresponding Marc Edit view will look like this:
NOTE: Once you’re done editing in the flat text editor, you should switch back to the Enhanced MARC Editor to make sure that your formatting is correct.