Template Information #
Print Templates
HTML tags and CSS styling allow for a great deal of local customization in the presentation. There are hundreds of instructional websites and books out there to help you get to know HTML and CSS. If you’d like slightly more structured instruction, you might try the curriculum at:
Angular expressions provide the dynamic content in a receipt or printable report. Angular use is changing rapidly in Evergreen, but there are many online support websites, including:
The Angular expressions are used to define what information from the database appears on a selected receipt. Not all expressions are available on every receipt. Most objects and fields specific to a given receipt type are listed in the leading comment section of the receipt template. Expressions are built with fields out of objects. Expressions are placed inside paired double curly brackets, e.g. {{Patron
For general use in the Print Template Editor, you really only need to know how to enter an expression and how to style it. Angular styling is completed by adding a pipe ( | ) to the end of the expression and adding a filter to transform the base entry. Examples of some of the transform filters used in templates include:
- currency: adds currency notation to a number
- {{payment_total | currency}} == $12.99
- date: present a date in a specified format.
- {{checkout.circ.due_date | date:’mediumDate’}} == Apr 15, 2018
- {{Hold.shelf_expire_time | date:’MM/dd’}} == 04/15
A request placed by staff or patrons for materials to be picked up at a selected location (see Pickup Library).
- limitTo: creates a substring
- {{PatronCardholder with an Evergreen Indiana account. See also: user, customer, etc..family_name | limitTo:3}} == Jon [First 3 letters of PatronCardholder with an Evergreen Indiana account. See also: user, customer, etc.last name]
- {{PatronCardholder with an Evergreen Indiana account. See also: user, customer, etc..card.barcode | limitTo:-3}} == 345 [Last 3 digits of PatronCardholder with an Evergreen Indiana account. See also: user, customer, etc.barcode]
- {{Patron
- uppercase: makes all characters in a string upper case.
{{Patron
Print TemplatesTemplates that Evergreen uses to print various receipts and tables.
(Original) #
Administration > Workstation > Print Templates
Editing templates #
To edit templates, select the desired template from the Template Name dropdown and enter your edits into the Template box on the right.
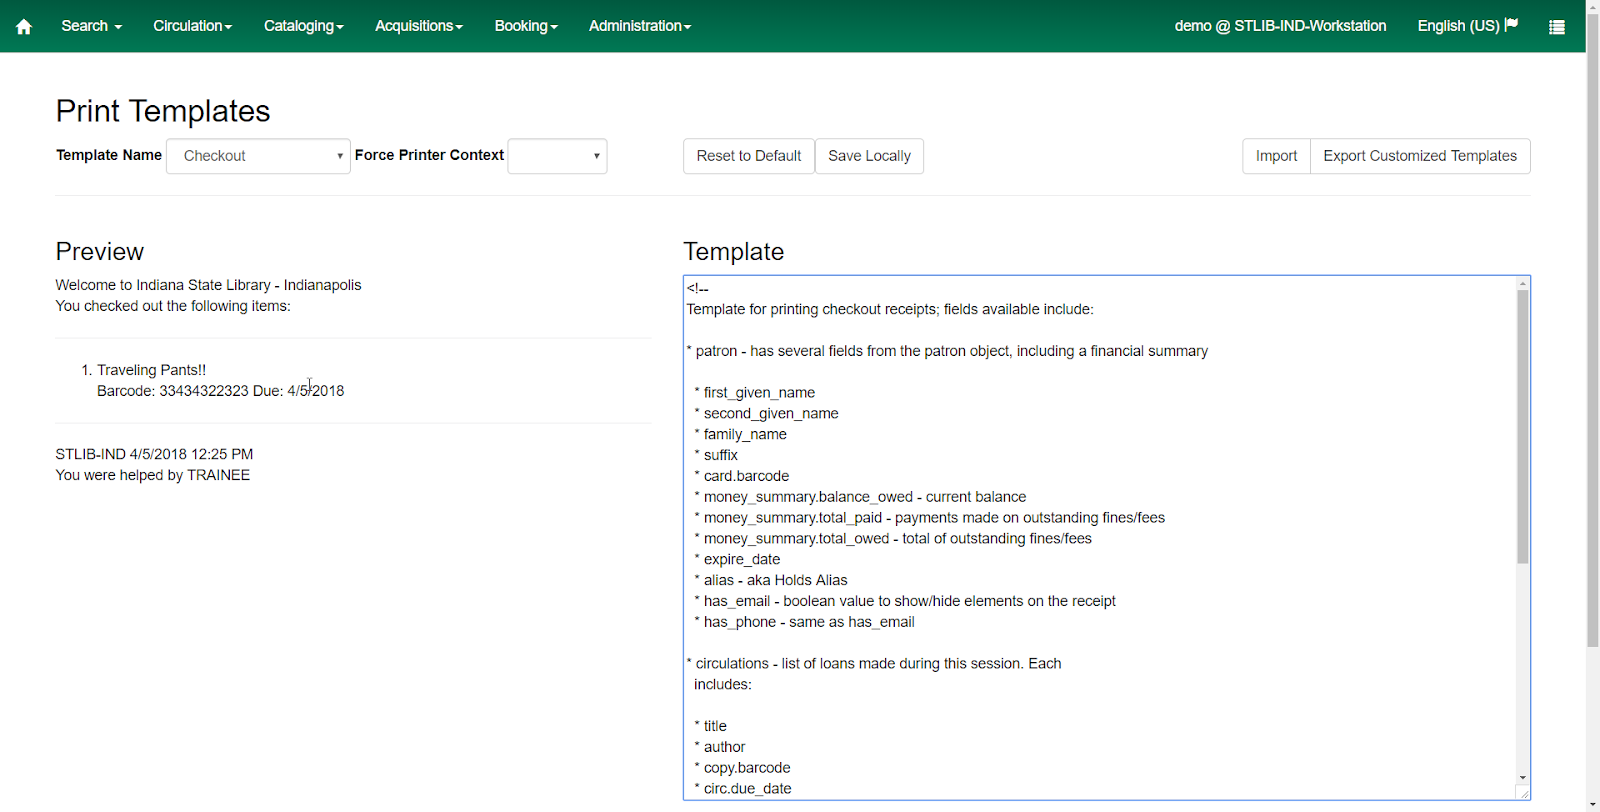
Be sure to click Save Locally after each template edit in order to save any changes made!

Restoring a template #
You can always restore a print template to the consortium default by clicking on Reset to Default and then Save Locally. This can be especially useful if you’ve made a lot of edits to a template, but are not happy with the results.

Sharing templates #
The entire set of Print Templates

Then open up that location and click on Import on the new workstation.
For sharing single templates, it is simpler to copy and paste the text of the template from one workstation to another.
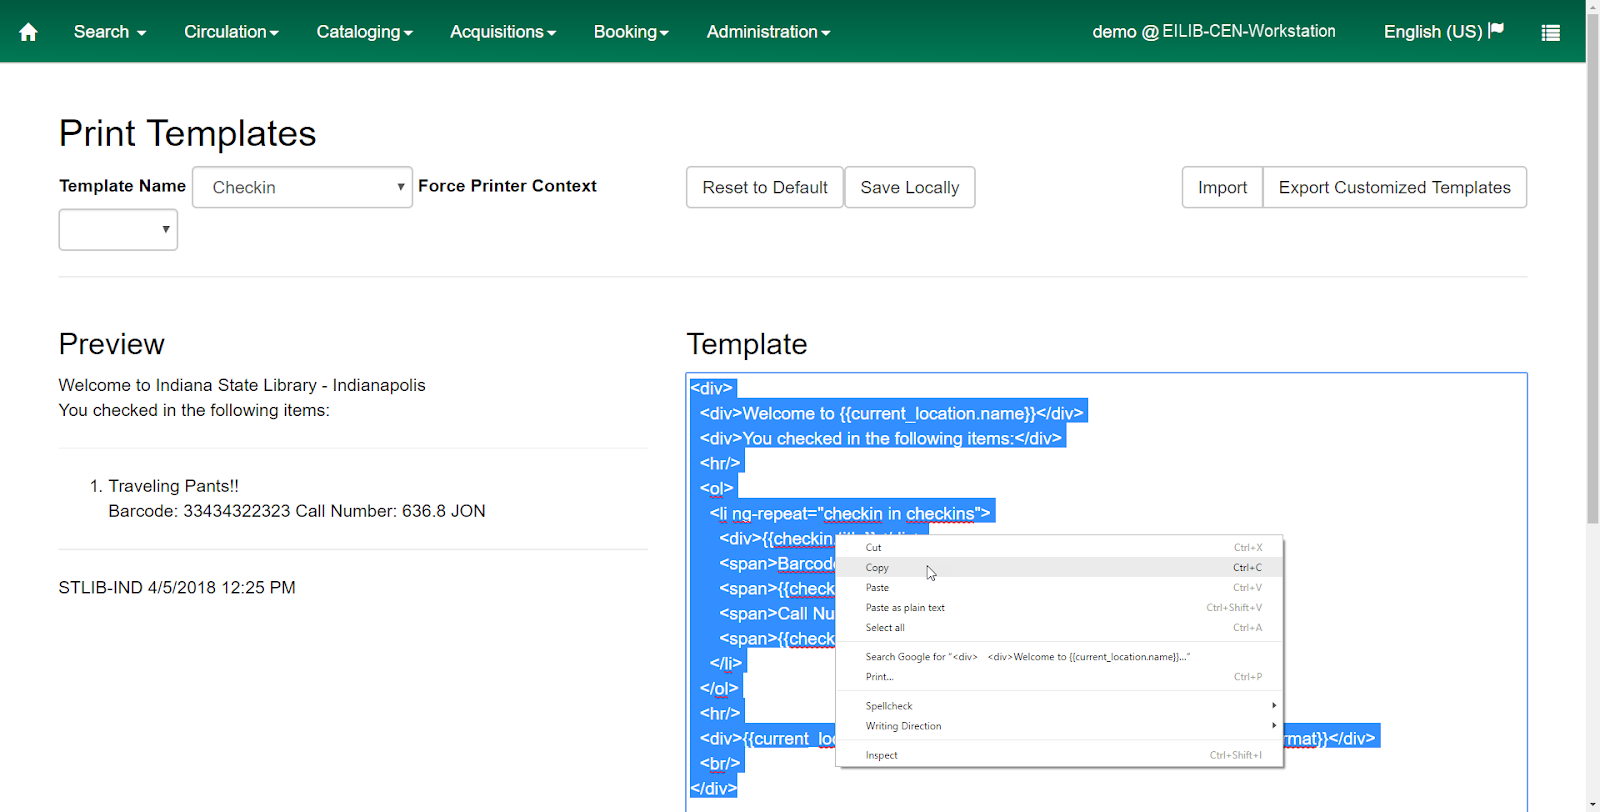
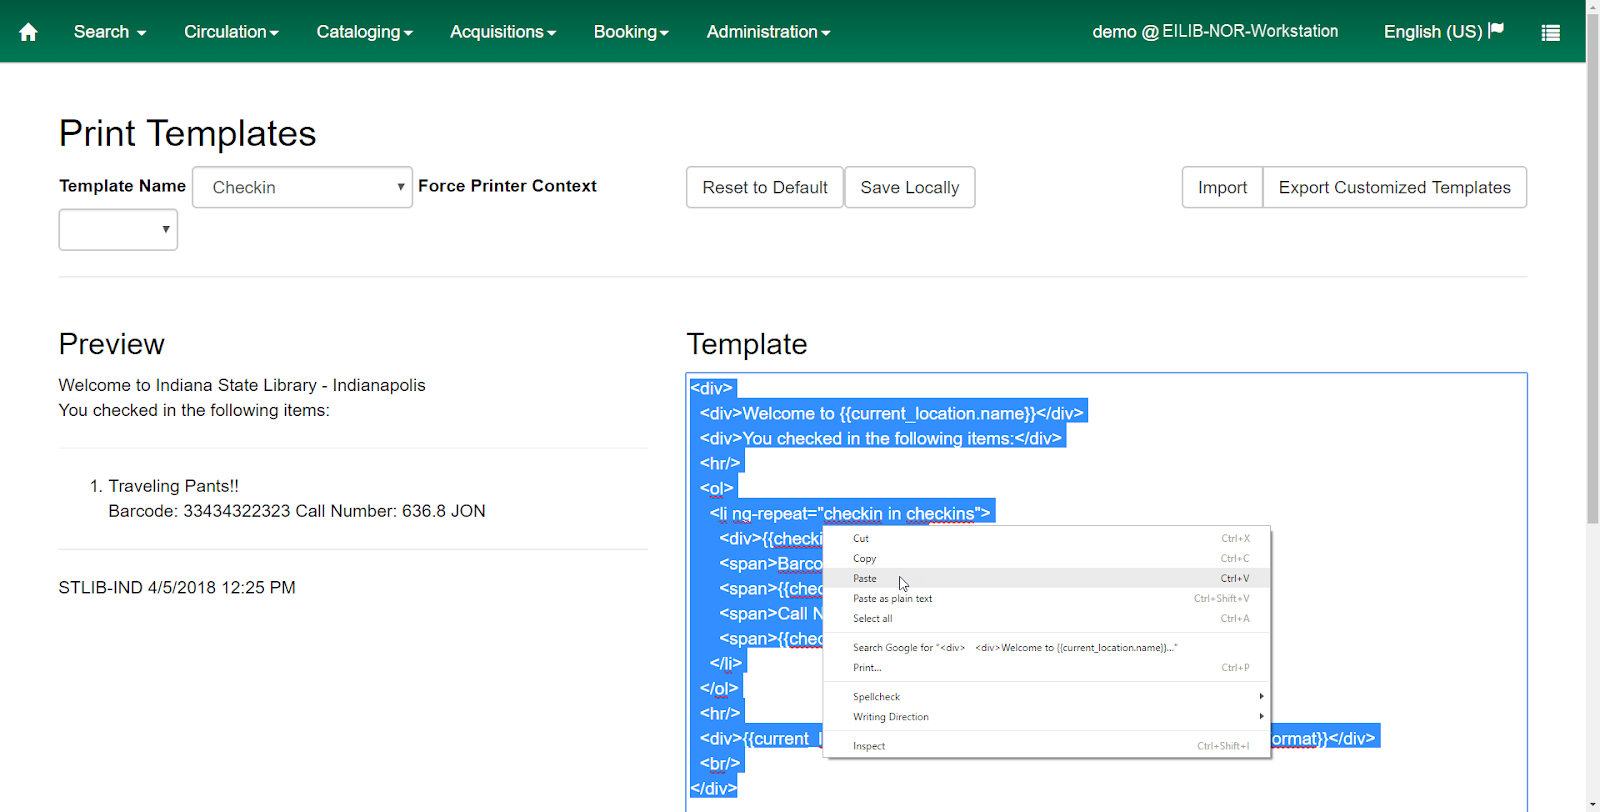
Be sure to Save Locally after pasting the replacement template into a new workstation.

Available Customized Print TemplatesTemplates that Evergreen uses to print various receipts and tables.
#
We are working on collecting a variety of template options for you to implement at your libraries. A limited number are available now. Please choose the template name below to see what options have already been made available. If you have templates you wish to share, please email them to the Coordinator.
Available Customized Print TemplatesTemplates that Evergreen uses to print various receipts and tables.
#
- Bills, Current
- Bills, Historical
- Bills, Payment
- Checkin
- Checkout
- Hold Shelf Slip
- Hold Transit Slip
- Holds for Bib Record
- Holds for PatronCardholder with an Evergreen Indiana account. See also: user, customer, etc.
- Holds Pull List
- HoldShelf List
A request placed by staff or patrons for materials to be picked up at a selected location (see Pickup Library).
- In-House Use List
- Item StatusItem Status allow syou to see the status of an item without having to go to the actual bibliographic record.
- Items Out
- PatronCardholder with an Evergreen Indiana account. See also: user, customer, etc.Address
- PatronCardholder with an Evergreen Indiana account. See also: user, customer, etc.Note
- Renew
- TransitList
Material shipped between Evergreen Indiana libraries.
- TransitSlip
Material shipped between Evergreen Indiana libraries.
- Offline Checkout
- Offline Renew
- Offline Checkin
- Offline In-House Use
Additional Receipt Template Customization Tips #
Some receipt template customization tips and code snippets have been gathered from the Evergreen ILS User community and are available here.
Holds Pull List Template (Angular) #
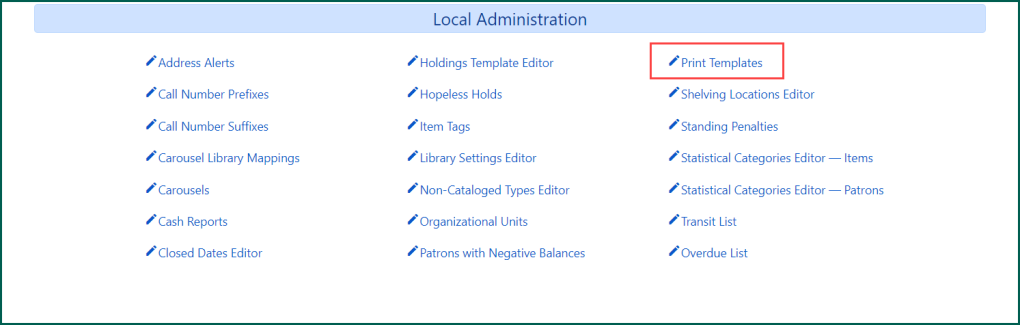
Administration > Local Administration > Print Templates
Interfaces that have been updated to the Angular language will no longer use the Print Templates
Angularized Print Templates
In order for the template to print based on your customizations, Hatch
NOTE: As of this writing (12/19/2022), only the Address Label, Booking capture slip, Hold A request placed by staff or patrons for materials to be picked up at a selected location (see Pickup Library).
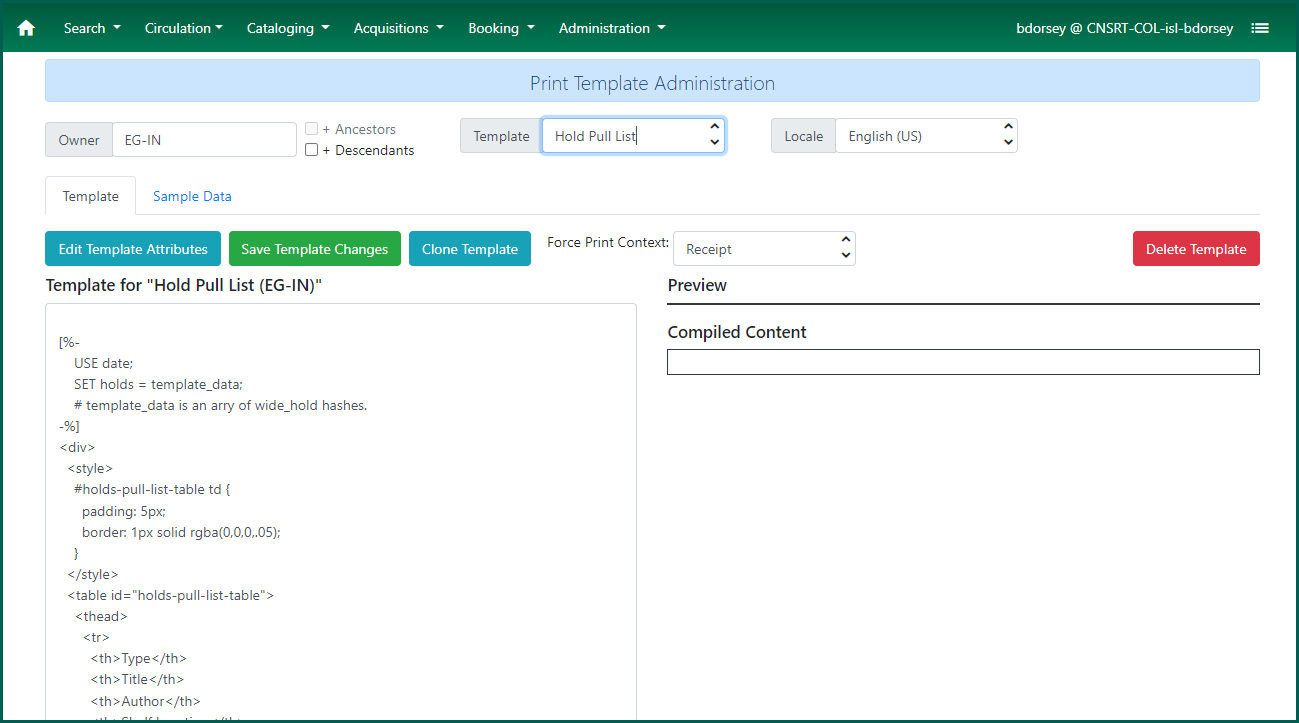
Access #
To access the angularized Print Templates
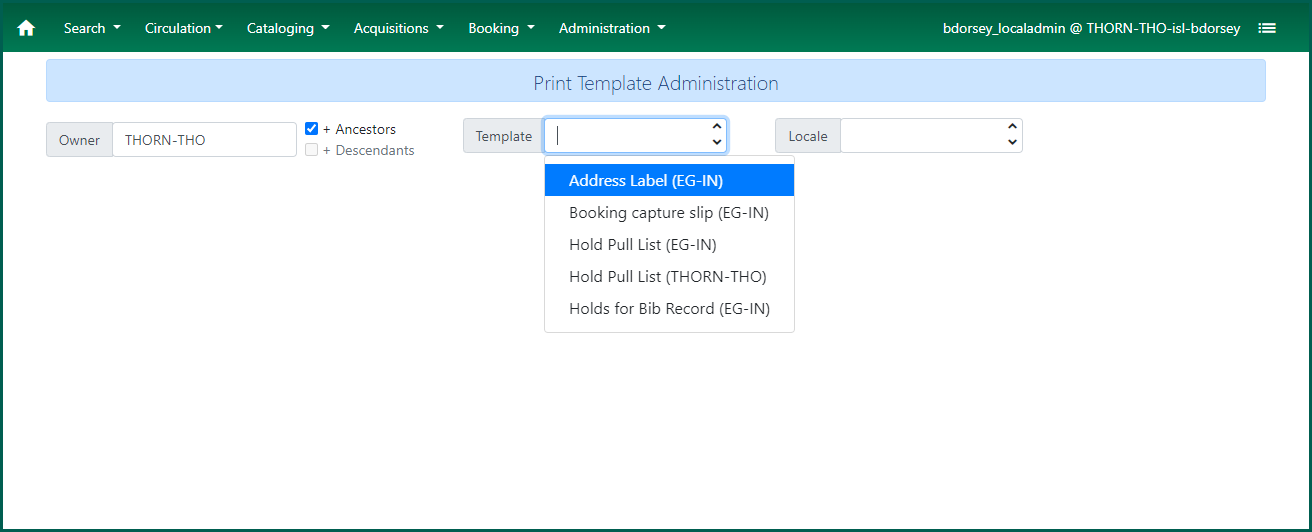
Upon loading, your workstation’s location will appear by default in the Owner selector. Templates can be selected from the drop-down based on the owner or if the Ancestors/Descendants buttons are checkmarked. Locale is not necessary at this time.
NOTE: If your library system or branch is visible in the Owner drop down, check-marking Ancestors should bring up all EG-IN owned templates.
Cloning Templates #
In order to add templates to your library system or branch, you must clone the consortium-level templates first.
Use the org-unit selector and select EG-IN from the drop-down. OR, with your library system or branch selected, check-mark Ancestors to show the consortium-level templates.
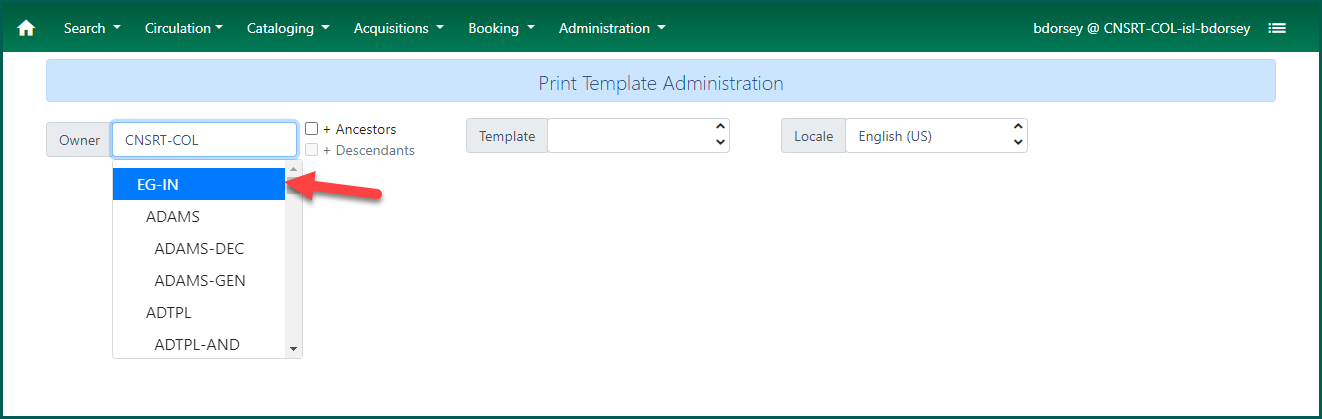
Once selected, clicking the Template drop down will reveal the consortium-level pre-made templates.
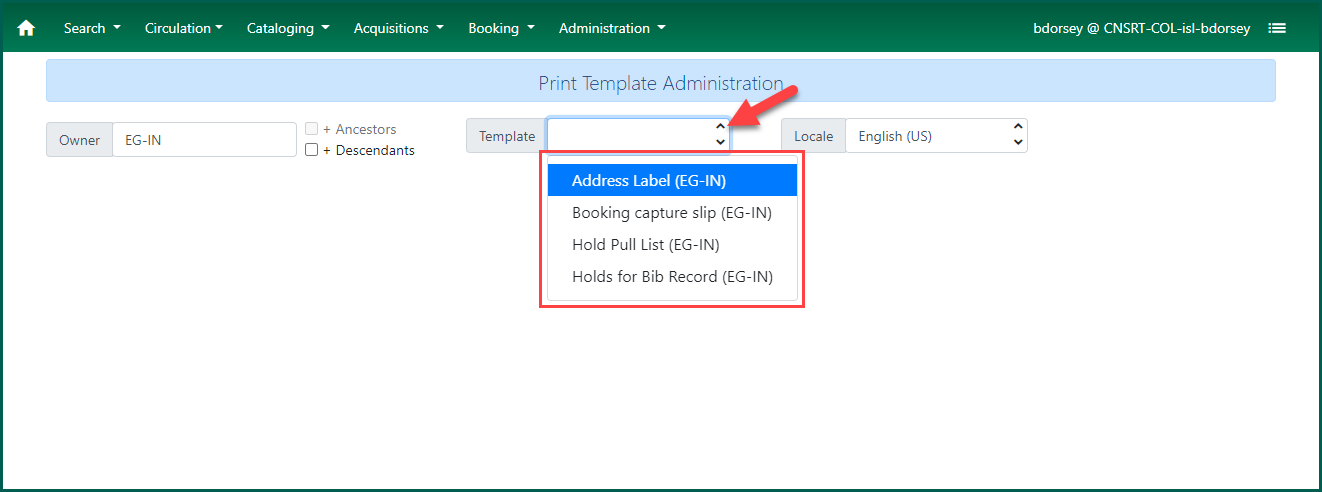
Select the template you wish to clone. The template and menu options will load below.
To clone the open template, click Clone Template.
Within the pop-up, select your library branch or system from the Owner drop down. Check-marking Active will activate the template. Any cloning or template changes will not take affect until the template is activated. This can be done at a later time by editing the template attributes.
If the template is inactive, (Inactive) will appear below the template options.
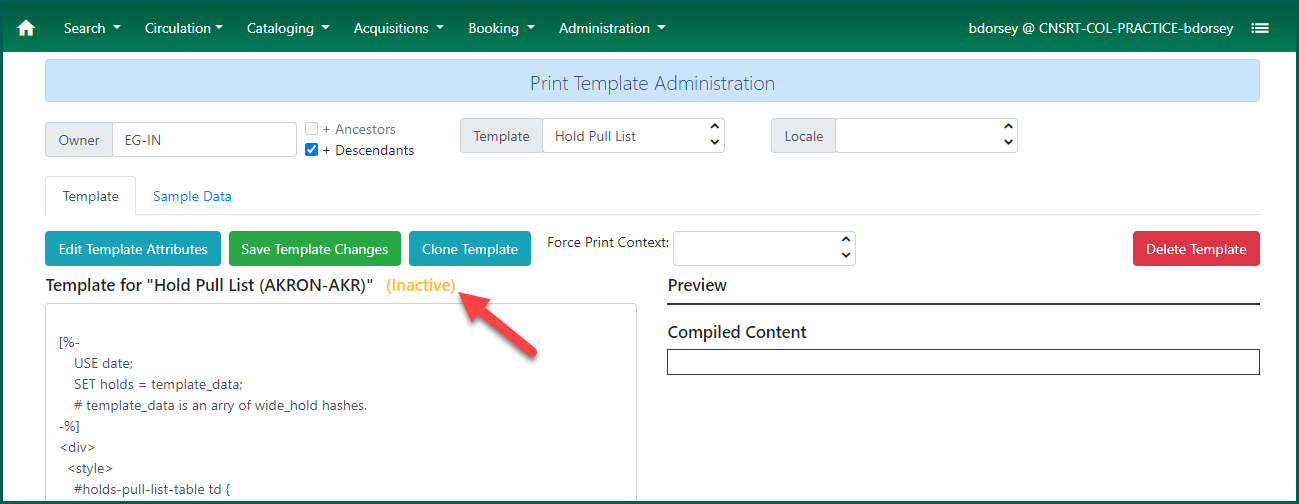
You do not need to click Save Template Changes to save a newly cloned template.
Editing a Template #
To edit templates, select the desired template from the Template dropbox and enter your edits into the Template box.

After changes have been made, click Save Template Changes.

NOTE: For saved edits to appear, you may need to log out and log back into the Evergreen web Client
Activating Templates #
When you are ready to activate your template, click Edit Template Attributes. Within the pop-up, checkmark the Active button and click Save.
NOTE: You may only have one active template type at each branch-level, or at the system level. Multiple templates of the same type cannot be utilized at a single branch (you cannot have two different Hold A request placed by staff or patrons for materials to be picked up at a selected location (see Pickup Library).
Force Printer Context #
Force Printer Context will allow you to select a default printer (set up within Hatch
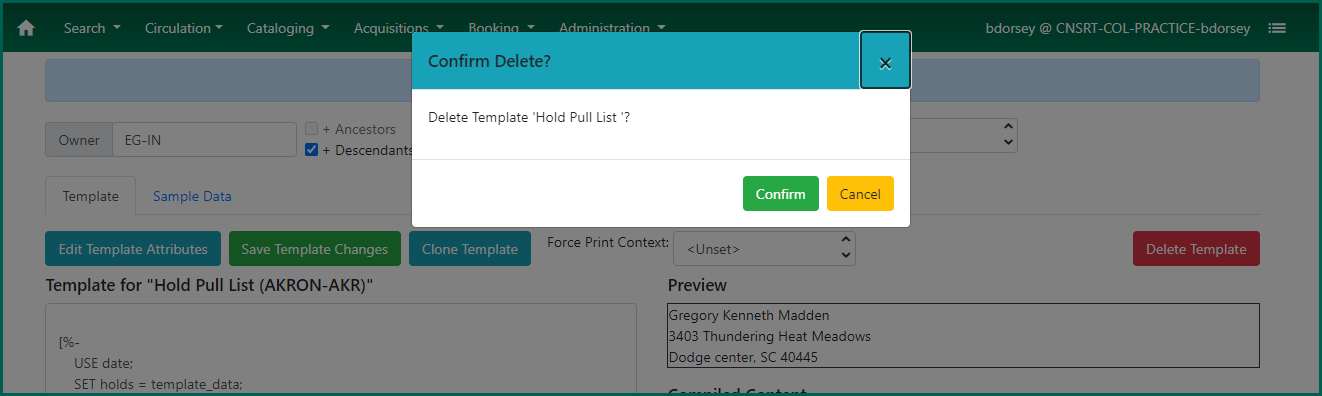
Delete Templates #
To delete a template owned by your library, select it from the Template drop down and click Delete Template. Confirm that you wish to delete the template by clicking Confirm.